The first Bloomax quilt I have sewn was for the Tilda Jubilee range and events here in Australia.The Tilda Jubilee quilt is the 48" × 48" size. Bloomax comes in three sizes with different layouts for each size:
I declare a new size for quilts. The NAP. Perfect for napping under. Anywhere around 60" square is where I like my nap quilts to finish. Make a Bloomax nap quilt for yourself, dive into your stash of collected favourites and go to town. Bloomax is a celebration of all things scrappy and textural. Use florals, spots, plaids, checks, stripes, animal prints. Don’t be shy. Experiment with combinations. For the backgrounds try using wovens, or a low-volume background, checks (like the bonus table runner shown here) or florals. Don’t be shy.
The Bloomax pattern has detailed instructions on how to prepare and sew the quilt to set you up for success and a fun sewing experience. There are acrylic templates available as an option, however the pdf and printed pattern all come with a template sheet that can be used to create templates using template plastic or similar. I recommend printing out and tracing onto template plastic for durability, specially the petals and these will be used a lot to make the quilt and to keep the integrity of the petal shape.
When sewing the Tilda Jubilee Bloomax I decided to use a wool batting, it added extra loft and squishiness to the quilt and it is delightfully light. It is a little more challenging to hand quilt due to the loft, but absolutely worth it. The next Bloomax I'm sewing I'll use a cotton batting.
BONUS there are a couple of bonus makes for Bloomax which I’m so excited to share. The first of which is a table runner. You’ll need the Bloomax pattern and then enter your details below to receive the pdf instructions for the table runner and you'll also receive updates about more Bloomax bonus projects.
]]>
Trace a circle onto the wrong side of your chosen fabric and cut it out.
With the fabric wrong side up A, fold the circle in half and make a gentle crease on the fold B, don’t unfold the circle, holding the creased edge fold that across to make a quarter circle and press the folded creases C, now open up and place fabric wrong side up D.
Take the bottom of the circle up and line up the vertical crease and finger press along the fold to crease the fabric E. Then take up the folded outer edge of the circle of the crease just made and fold that in to the centre crease F. Continue to do the same process until you have folded in all the edges, on the last fold, dab a little glue in the centre and then fold the last edge. To hold the hexagon in place, or use a pin, but I find a little glue is better, G through to J. Congratulations you’ve folded your first hexagon!
]]>I'm excited to share this Tea for Me quilt block with you. I have needleturn appliqued the block as pictured however you could use any preferred applique method including fusible or machine.
This FREE block is part of the Quilt Block Mania March event.
]]>I'm excited to share this Tea for Me quilt block with you. I have needleturn appliqued the block as pictured however you could use any preferred applique method including fusible or machine.
This FREE block is part of the Quilt Block Mania March event (thanks Carolina for being our host) and the theme is Drinks. If you know me at all you will know that I am a tea drinker. It's my favourite beverage. Black tea, with a dash of milk. Strong, but not too strong and in a favourite mug, is so soothing. Second to that is chai tea. Especially honey soaked chia, so so good.
To receive this free block enter your details below and the block pattern will be sent to your inbox. You'll also join the Scrappy Digest newsletter (you can unsubscribe at anytime). A follow-up email will be sent in the following days, so keep your eyes peeled. If you sew the block I'd love to see it, email me or tag #TeaForMeBlock on Insta.
The Quilt Block Mania crew also have a Facebook group. So if that's your thing, join up! LINK
Enter your details to receive my FREE Quilt Block Mania March block ‘Tea for Me’ pdf to your inbox. You will be signed up to the Scrappy Digest newsletter. Unsubscribe at anytime.
Champagne Quilt Block by Carolina Moore
Martini by Crafty Staci
You Shake Me Up
Scrappy Mug by Katie Mae Quilts
Pina Colada by Appliques Quilts and More
Cosmopolitan by Inquiring Quilter
Cups and Saucers
Bubble Tea by Inflorescence Designs
Beer Pong by Patti's Patchwork
Perfect Flying Geese
Bear Loves Cocoa by Colette Belt Designs
Coffee Bean by Sewistry
Sip & Stitch by Happy Hour Stitches
I'm a LIttle Teapot
Bit too Much by Epida Studio
Tupperware Pitcher by Cristy Fincher
Ice Cubes by Create with Claudia
Cherry by Slightly Biased Quilts
Tea for Me by Craftapalooza Designs
French Press by Oh Kaye Quilting
Sew Fresh FPP Block by San Diego Sewn
Cheerwine by Emerald Falls Quilts
Release the Kraken by Art Quilts by Design
But First Coffee by Paleofish Designs
Margarita by Sallys Sewing Circle
Iced Lemonade by Patchwork Breeze
Happy sewing and sippin' tea.
]]>This FREE block is part of the Quilt Block Mania February event (thanks Carolina for being our host) and the theme is Maker. Why rainbow for Maker? Well for me sewing and creating by hand is all about glimmers. Those small moments of joy and peace, like when we see a rainbow.
To receive this free block enter your details below and the block pattern will be sent to your inbox. You'll also join the Scrappy Digest newsletter (you can unsubscribe at anytime). You'll receive a follow-up email the next day with more bonuses and information, so keep your eyes peeled. If you sew the block I'd love to see it, email me or tag #RainbowGlimmers on Insta.
The Quilt Block Mania crew also have a Facebook group. So if that's your thing, join up! LINK
Check out all of the other fabulous blocks:
Gear Quilt Block by Carolina Moore
Hammer by Patchwork Breeze
Canning Jars by Crafty Staci
Rotary Cutter by Katie Mae
Cricut Maker by Appliques Quilts and More
Spool and Bobbins by Inquiring Quilter
Music Maker by Scrapdash
Variegated Thread by EvaPaige Quilt Designs
Pretty Spools by Sew Worthy Mama
Pottery by Inflorescence Designs
Quilt Maker by QuiltFabrication
Maker block by Patti's Patchwork
Heart Hand by Brown Bird Designs
Quilting Bear by Colette Belt Designs
My Favorite Things by Robin Kinley Designs, Etc.
Cross Stitch Block by Slightly Biased Quilts
Paint Palette by Tourmaline & Thyme Quilts
Sewing Friends by Epida Studio
Make My Mark by Cristy Fincher
I Love to Make quilt block by Victoria Peat
Rainbow Glimmers by Craftapalooza Designs
Sweetgrass Basket by Emerald Falls Quilts
Maker Block: Sewing Machine by Oh Kaye Quilting
Pincushion by Flowerdog+Co
Painters Tools FPP by Amanda Harris
Happy sewing and watch out for those glimmers.
]]>Yo-yo's are super fun and fast to sew. They can be used to decorate patchwork or used by themselves to make a coverlet. I have used them in several patterns.
You will need:
DOWNLOAD THE FREE PDF YO-YO TEMPLATES AND BLOG POST
I have a video with annotations on how to use a Clover Yo-yo maker over on Instagram. LINK.
Inside this mini masterclass, you'll find everything you need to know to create beautiful patchwork quilt blocks. From recommended tools and notions, templates and how-to handpiece videos. You'll learn how to create flawless seams, perfectly aligned corners and pivots whilst sewing an adorable house block.
The mini masterclass dives into techniques that will take your handpiecing patchwork skills to new heights. With step-by-step instructions , videos and detailed illustrations, you'll be able to tackle complex blocks and sew quilts.
Here's what you can expect over the three days:
Imagine the sense of pride and accomplishment you'll feel when you complete your very own handsewn patchwork quilt. The mini masterclass will have you well on your way.
Sign-up for "Mastering the Basics: A Step-by-Step Guide to Handsewing Patchwork Quilt Blocks" now and embark on an exciting quilting adventure that will transform your patchwork. Enter your email below to start the three day mini masterclass. Let's create something beautiful together!
*By signing-up you will be subscribed to the Scrappy Digest newsletter, you can unsubscribe at anytime, but wait until you've received the mini masterclass emails first!
]]>Welcome to a year of quilting delights with the 2024 Block of the Month (BOM) Club! This exclusive club not only promises a creative adventure but also offers earlybird sign-up participants that joing by 31 December 2023 the chance to win one of two fantastic prize packs from our sponsors.
]]>Welcome to a year of quilting delights with the 2024 Block of the Month (BOM) Club! This exclusive club not only promises a creative adventure but also offers earlybird sign-up participants that sign-up by 31 December 2023 the chance to win one of two fantastic prize packs from our sponsors. Let's dive into the details of what awaits in the Mariners Mischief and Meadowlicious quilt BOMs.
Are you ready to embark on the Mariners Mischief journey starting from 5th February 2024? This sampler quilt features 10 blocks ranging from 5” to 12½”. Delivered online monthly, each package includes PDFs, detailed written instructions, some video, and templates to guide you through the quilting process. Details about optional acrylic templates will be emailed out first week of January. As a guide the full set of templates will retail around AUD$175 and the mariners block only set will be approximately AUD$65. Plus postage for either of those.
In June 2024, the Meadowlicious quilt takes centre stage, allowing you to sew your own meadow of flowers and critters. Like Mariners Mischief, this appliqué quilt will be delivered online month by month, providing you with PDFs, comprehensive written instructions, including some video, and templates to bring your meadow to life.
Sign up early to secure your spot and enjoy the perks of earlybird registration. Everyone that signs up by 31 Demember to the 2024 BOM Club is automatically entered the BOM giveaway^ with the chance to win one of two prize packs from our Sponsors, Oliso, Wonderfil Australia and Polka Dot Tea Fabrics.
The prize packs include:
The BOM Club will have it's own online community on the same platform as accessing the BOM, all in one convenient spot. A warm, cozy space to ask questions and share progress and meet other lovely BOM Clubbers.
A heartfelt thank you to our generous sponsors for providing our giveaway prizes for the 2024 BOM Club: Oliso, Wonderfil Australia, and Polka Dot Tea Fabrics. Their support adds an extra layer of excitement to this year's BOM Club.
Embark on this quilting adventure, connect with a vibrant community, and let your creativity flourish in the 2024 Block of the Month Club!
^ There will be 3 winners, one for each prize pack (2 packs) and one person will win back the cost of their purchased BOM. No prizes be transferred or exchanged for cash.
First up, practice, practice and practice. Practice makes improvement, start with a smaller project, like a cushion. Do some test projects. Want to see some of my earliest needle turn? Here you go LOOK, I don't need to pin it into submission anymore (lol). I really wanted to learn more and improve my needle turn applique, I loved the way applique looked, so I kept at it. At the bottom of this post are videos created to support my Bloom pattern series, but the tips are applicable to needle turn applique in general.
We're all beginners at some point and taking the time to learn and improve is so satisfying when you start to see improved results. I could do a 5 minute talk and point out all of the 'issues' with my needle turn on my applique, but what would be the point?
With pieces of applique that have legs or finer details, when you're initially cutting out the piece, don't cut into these details, leave more fabric around them to 'protect' the edges and only snip around them closer once you're about to stitch. This will help prevent fraying and distortion of these pieces and also minimise frustration.
Oh, and it might be obvious but it's called needle turn applique for a reason. Use the TIP (the sharp, pointy, owie part) of the needle to help turn under the seam allowance to stitch down. You'll notice the difference once you do that. Another beginners tip is to finger press the seam so you have a 'pre crease' of sorts to assist with turning under the seam allowance.
When I say 'right' I mean right for you! Try out different needles and thread. Needles and thread do make a HUGE difference when it comes to needle turn applique. My personal favourite needles for needle turn are Bohin Long Applique Needles and these days I also use a needle threader. The eye on applique needles is super small and 80wt thread is also very fine. My 50+ year old eyes need some assistance! 80wt aurifil is also a great thread for applique and one I use often, I have also recently been trialling Wonderfil Effina 60wt and liking the results so far with this thread.
The rule of thumb is to match the thread colour to the applique fabric, not the background, however, I often will use a light silver thread for most of my applique, there are some instances where I will colour match if there's too much contrast and I can see stitches, but 90% off the time this works for me.
These Karen Kay Buckley 4" small perfect applique scissors are just that, perfect for snipping seams and getting into finer details. These scissors have a micro serrated blade that keeps fabric from slipping so cutting is more accurate and helps to prevent frayed edges.
I use Roxanne Applique Glue and this particular bottle as the tip is fabulous and prevents you from using a lot of glue. You really only need very small amounts of glue. We're not gluing down the piece that needs appliquing we're just lightly attaching it. Keep glue away from the edges and seam allowances so it doesn't interfere with your stitching. Roxanne's is very strong, so if you use too much and then want to reposition a piece once it's dry it might be a struggle to separate the fabrics.
That's pretty much all you'll need. Thread, needle and glue. I do occasionally pin pieces down, it really depends on the design and what will suit the applique I'm working on. I really hope you try needle turn applique, it's a wonderful and mindful and creative technique.
You may have noticed that some of the links in this newsletter are affiliated, which means that I earn a small commission if you make a purchase through them. I want to assure you that these links do not cost you anything extra and in some cases, they may even offer you a better price.
]]>The Frolic Pattern is only available this year via the Easter Makers Bundle from 15 to 21 March 2023. Save the date and here's the link to purchase once the bundle is live!
The Frolic Cushion has been made using Essex Yarn Dyed Linen for the background, I think it's Flax colourway - I used what I had available and it was prewashed. I'm not a prewasher usually but as I was appliqueing shapes to this cotten/linen I wanted to ensure that the fabric wouldn't shrink further once appliqued. So a quick wash and hot press after it was dry to get the backing ready.
The applique shapes and yo-yo's on the Frolic Cushion were all sewn using Liberty Tana Lawn. I find lawn is glorious to applique and a project like this using smaller amounts of lawn isn't a huge investment, for those of you that may not be used to Liberty. Visit your local quilt shop and buy some fat sixteenths and try out some Lawn. A local to me (Perth, Australia) quilt shop has a great offer called a Liberty Lucky Dip - you can choose the size of cut, colour pallette and tone of fabrics you'd like. It's a great way to experience Liberty. LINK. You can, of course, applique with patchwork fabric and most fabrics respond well, I would try out different patchwork fabrics and see how they handle applique.
When choosing a grouping of fabrics for Frolic Cushion, I started with the print I was going to use for my Rabbit, Liberty Tana Lawn Small Susanna Pastel (pictured below), and then chose other prints around this. I like to build a stack of fabrics and then lay them out, see how they're working with each other and I will often pull out more prints than I need and edit any out that don't quite fit.
First up, practice, practice and practice. Practice makes improvement and a cushion project like this is a perfect sized project to try needle turn. Do some test pieces, cut out a smaller square and applique one of the flowers. Want to see some of my earliest needle turn? Here you go LOOK. I really wanted to learn and improve my needle turn applique, I loved the way it looked, so I kept at it.
We're all beginners at some point and taking the time to learn and improve is so satisfying when you start to see results that make you smile! I could do a 5 minute talk and point out all of the 'issues' with my needle turn on my Frolic Cushion sample, but what would be the point? It still looks fabulous and is one of my favourite makes so far this year.
With pieces of applique that have legs or finer details, when you're initially cutting out the piece, don't cut into these details, leave more fabric around them to 'protect' the edges and only snip them once you're about to stitch. This will help prevent fraying and distortion of these pieces and also decrease any frustrations!
Oh and it might be obvious but it's called needle turn applique for a reason. Use the TIP (the sharp, pointy, owie part) of the needle to help turn under the seam allowance to stitch down. You'll notice the difference once you do that. Another beginners tip is to finger press the seam so you have a 'pre crease' of sorts to assist with turning under the seam allowance.
When I say 'right' I mean right for you! Try out different needles and thread. Needles and thread do make a HUGE difference when it comes to needle turn applique. My personal favourite needles for needle turn are Bohin Long Applique Needles and these days I also use a needle threader. The eye on applique needles is super small and 80wt thread is also very fine. My 50+ year old eyes need some assistance! 80wt aurifil is also a great thread for applique and one I use often, I have also recently been trialling Wonderfil Effina 60wt and liking the results so far with this thread.
The rule of thumb is to match the thread colour to the applique fabric, not the background, however, I often will use a light silver thread for most of my applique, there are some instances where I will colour match if there's too much contrast and I can see stitches, but 90% off the time this works for me.
These Karen Kay Buckley 4" small perfect applique scissors are just that, perfect for snipping seams and getting into finer details. These scissors have a micro serrated blade that keeps fabric from slipping so cutting is more accurate and helps to prevent frayed edges.
I use Roxanne Applique Glue and this particular bottle as the tip is fabulous and prevents you from using a lot of glue. You really only need very small amounts of glue. We're not gluing down the piece that needs appliquing we're just lightly attaching it. Keep glue away from the edges and seam allowances so it doesn't interfere with your stitching. Roxanne's is very strong, so if you use too much and then want to reposition a piece once it's dry it might be a struggle to separate the fabrics.
You may have noticed that some of the links in this newsletter are affiliated, which means that I earn a small commission if you make a purchase through them. I want to assure you that these links do not cost you anything extra and in some cases, they may even offer you a better price.
]]>We, Lauren - Molly and Mama and Nic - Craftapalooza Designs, are sew excited to bring you the Easter pattern bundle collaboration. It's only available for a very limited time: 15-21 March 2023. You will have until 31 March to download the pdf's.
Easter is just around the corner, and it's never too early to start planning for the holiday season. While there are many ways to celebrate Easter, if you're looking for a creative and unique way to make the holiday special for your loved ones, the Easter Makers Pattern Bundle may be just what you need!
The Easter Makers Pattern Bundle is a carefully curated collection of PDF sewing patterns from international designers with years of experience. It includes a variety of Easter-themed designs, ranging from cute bunny softies to home furnishings like cushions and placemats, and more. The bundle offers a variety of sewing skills to explore, including embroidery, foundation paper piecing, English paper piecing, hand quilting, yoyo or Suffolk puff making, needle-turn applique, hand sewing with wool felt, and more.
The Easter Makers Bundle features 9 talented designers, each with their own unique style and perspective. These designers for the inaugural Easter bundle are:
The Easter Makers Pattern Bundle includes a range of sewing project patterns that are perfect for various Easter crafts. There is everything from embroidery designs, cushions, Easter baskets, and an adorable bunny softie to make. Some of the designers will also have kits, offers, and discounts included with their pattern.
Apart from the obvious joy that comes from creating something special for your loved ones, the Easter Makers Pattern Bundle offers several benefits. Firstly, it is priced significantly lower than purchasing each pattern individually, providing cost savings. Secondly, it saves you time and effort, as you don't have to search for Easter patterns online or in stores. Thirdly, this sewing pattern bundle has been carefully curated to include only the loveliest projects from renowned and experienced designers.
To get the Easter Pattern Bundle, visit the Makers Bundles website from March 15th to 22nd, 2023. Alternatively, visit one of your favourite designers listed above, and sign up for their newsletter to get a reminder! The bundle will be live from 15th March 2023 for 7 days. Don't miss out on the chance to create something special for your loved ones this Easter!
]]>I'm so excited to share something new! A patchwork calendar full of amazing creative designs and beautiful photos.
The 2023 Patchwork Calendar is a collaboration between 12 designers to bring you a gorgeous, printed calendar PLUS all 12 pdf patterns featured in the calendar. That's over AUD$200 (USD$130) worth of patterns, PLUS a printed calendar. AND, that's not all (no, not a set of steak knives) our designers have also included 10% off for the next year for items in their shops*.
So you get a pretty calendar to hang in your home or creative space and enjoy all year and 12 pdf patterns to sew. It's also the perfect gift for your patchwork friends!
The calendar will be available to purchase from Monday 10 October until Sunday 6 November. This is a limited-time offer.
Make sure you're on the Scrappy Digest so you get first notice of when the calendar is live!
On completion of purchase, within 24 hours you will receive an email with a link to download the pdf patterns. Please do so by the end of November 2022 as the links will be taken down.
I'm excited to share that the 2023 designers are:
January: Lauren Wright | Molly and Mama
February: Lynett Muhaso | Lyns Avenue
March: Jemima Flendt | Tied With a Ribbon
April: Kate Henderson | Kate Henderson Quilts
May: Angie Wilson | GnomeAngel
June: Emma Jansen | Emma Jean Jansen
July: Kirsty Cleverly | Bonjour Quilts
August: Ben Millett
September Kristy Lea | Quiet Play Designs
October: Nic Vaughan | Craftapalooza Designs
November Jen Kingwell | Jen Kingwell Designs / amitie textiles
December: Jo Westfoot | The Crafty Nomad
* The calendar informational pdf that comes with the pattern will include this code as well as the discount terms for each designer.
]]>
The 2022 Sum of Us is finished, join the waitlist to be kept in the loop for future events.
A collaboration, running June to November between:
Thank you to everyone that jumped on, we loved running Sum of Us this year. If you'd like to be in the know about future events like this, jump onto the waitlist and you'll be subscribed to the Scrappy Digest. You can unsubscribe any time.
If you'd like to purchase Sum of Us blocks, Kristy has her versions up for sale. I'll update here if and when mine and Angie's, GnomeAngel are also available.
One Block
Three Ways
Once a Month
So, some context for you… We all ‘knew’ each other and were friends before the pandemic arrived but the arrival of that virus kicked off our almost weekly video chat sessions whilst we were in our homes navigating the world being turned upside-down. We are all scattered across Australia, air flights away from each other. Sum of Us is each of us celebrating our friendship and take on how we love to make patchwork using the same block.
For the next six months (June to November) we’ll be sharing a block a month, free for that month to download. Each month we’ll put our spin on the same block. Kristy’s will be foundation paper pieced, Angie’s will be rotary cut using templates and Nic’s will be rotary or hand cut using templates for hand piecing.
Quick sticks - sign-up at the beginning with any of us (Kristy, Ange or me) so you get all the blocks over the 6 months for free as they’re released. At the end of each month the block will then be able to be purchased from each of us, either as an individual block or within a quilt pattern. There will also be bonus layouts from each designer, details to come! You only need to sign-up with one of us and you'll receive the three versions for each month.
When you sign-up you'll receive my pattern Posse Patch using the Sum of Us blocks. The material requirements, tools and notion suggestions and first block will emailed out in June. So, if you want all the free blocks AND quilt pattern make sure you sign up in June.
* Full disclosure - by signing up to the Sum of Us you will be subscribing to each of the designer's newsletter list (Angie - GnomeAngel, Kristy - Quiet Play, Nic - Craftapalooza). You are able to unsubscribe at any time, but you want to stay subscribed to receive the Sum of Us blocks for 6 months, June through to November.
]]>Wheely Fun is a free pdf download. You'll receive full illustrated instructions on how to piece the block and it's an excellent introduction to hand piecing your quilt blocks.
]]>Enter your details below to sign up to the Scrappy Digest and you'll be emailed the free Wheely Fun quilt block pdf, you can unsubscribe at any time and your information is kept private.
Kitty Basket Meow (KBM) is a quilt block that comes with full piecing instructions and four layout options. KBM is a big gal finishing at 18", so she would also be perfect for a cushion or mini quilt. As the block is 18" it won't take you many blocks to get to a decent quilt size, sewing 16 blocks will get you a 72" × 72" quilt.
KBM is a new series of 'block only' releases. The block has been tested and you're provided with cutting instructions for single block and in this instance 16 blocks for a 4 x 4 layout. There are different options provided for the layouts. No overall maths for fabric quantities are provided. It's a straight up block, but this PDF is value packed and you can download, print, get your templates sorted and get sewing.
Finished Block size: 18" × 18" - yes she's a big gal. There are lots of opportunities for you to dive into your stash and choose some larger scale prints that you can fussy cut.
PDF Templates for the block - all clearly labelled and tested. Download. Print at 100%, check your 1" measurement and then trace on to template plastic or print onto a heavier board. I sometimes send mine to a print shop (like Officeworks here in Australia) and get them printed on a 300gsm board with a matt laminate, so they can be used again and again with no wearing down of the edges.
Full diagram instructions for piecing KBM - clear illustrations that take you through section by section of the block on how to construct the block. A lot of my blocks suit hand piecing, but if you are ok with some occasional partial seams or y seams you're good to go.
Cutting instructions including fabric colour value suggestions - there is maths for cutting one block or cutting 16 blocks (for the 4 x 4 layouts provided). But no yardage maths. Jump into your stash and get sewing. There is also colour value suggestions to assist you when choosing fabrics for your blocks.
4 layout options for a quilt 72" × 72" - blocks that create secondary patterns are one of my favourite in the quilting world and Kitty Basket Meow delivers! She's a slightly different looking block alone, but put her in a layout and she comes alive. This pdf includes 4 layout options for a square quilt.
Yes KMB is a template pattern. If you are new to them on my blog is a template post on how to make your own from those supplied in a pattern. Basically you want them printed on a board or traced onto a template plastic so that your edges maintain their integrity whilst you're using them.
Can you see the kitty's in the pattern? Then there are the baskets, and well meow just finished it off nicely. Oh and I'm a kitty mum to 3 cats. We have two tabbies, Spud who is 20!, Piggie is 14 and our tortie, Kidden is 4. Kidden I rescued after she was dumped as a baby kitty at the industrial estate I worked at. I spent a week trying to catch her in a trap, eventually catching her! She then gave us all ringworm, that was fun, not lol.
If you sew Kitty Basket Meow and share on socials please do tag me and use #kittybasketmeowblock.
]]>
This quilt is fat quarter and charm square friendly if you want to make a scrap version like mine, Scrappy Fizz, or you could go for the Be My Valentine or Over the Rainbow palettes or make your own! The pattern will have yardage calculations for 3 sizes and 3 colourways.
Due to the nature of the design, the original 'love knot' design is only fully available in the 80" x 80" design. There is also a throw size, 56" x 64" and a baby, 40 x 48", see the end of this post for images. All are very sweet designs, and fun, straight forward patchwork. The pattern will include colouring sheets, cutting charts, how-to for single half square trianles, as well as 2 at a time and construction tips and tricks.
I will also load up colouring sheets on Prequilt, so that will be added fun. These will be live on pattern launch.
Loventwined as pictured here was longarmed by Carol at The Quilting Cottage and she designed 'Nic's Heart' specifically for this quilt and I love this panto! If you're a Gammill user, Carol will have this panto available on the pattern cloud.
]]>
Have you seen Gretchen Rubin’s yearly lists? Rather than making New Year’s resolutions, which, let’s all agree we often don’t stick to… Gretchen creates a list of aims for the year. So 2022 is a list of 22 items. Items she’d like to do by the end of the year. Everything from easy one-off items through to bigger ambitious items. Gretchen also chooses a word for the year.
]]>You could easily do a quilter’s version. Do you have a work in progress that’s been sitting around a while? Have you wanted to learn a new-to-you technique like hand piecing or needle turn appliqué? Or are you an introvert that finds groups like Guilds overwhelming but THIS is the year you’d like to casually attend meetings and meet some likeminded quilters?
My 22 for 2022 is a work in progress and will be mix of personal, business and general life stuff. Everything from, you know, get back on that healthy eating habit path I started in November through to getting the leaky kitchen tap fixed and planting a wildflower garden.
You can read more about Gretchin’s 22 for 2022 here as well as download her pdf
I have made my own PDF and have split the list to include quilt specific aims, you can download it by entering your details below. Please do note that by doing so you will be signed up to my Scrappy Digest and can unsubscribe at any time. So here's to making some aims for 2022.
]]>Have you ever purchased a quilt pattern and then realised that you’ll need to make templates from the provided pattern as the block pieces are not all straight forward for rotary cutting? There are lots of template options when it comes to these type of quilts and personally they’re my favourite kind of quilt.
]]>There are lots of template options when it comes to these type of quilts and personally they’re my favourite kind of quilt. I love tracing templates and prepping my blocks ready to handpiece. Usually working in chunks, cutting 5-10 blocks at a time and then piecing. I also like to sew a test block before cutting out allll of the fabric, particularly if it's a block that could be a little tricky. Also to see if I'm happy with the fabric choices I've made and I have contrast where I want to see it and that the scale of the prints I've chosen are working well with each other.
When tracing templates, you want to use a marking pen/pencil that makes the 'work' easier! I love to use a mechanical pencil with a 0.7mm 2B lead. This lead is nice and soft and marks fabric easily. For dark fabrics a silver metallic GEL pen works a treat (this pen is also good for tracing shapes for appliqueing). Make sure the pen is a GEL pen.
Self Lamination: One option is to print the provided templates out (and checking that the 1" guide on the template has printed accurately and measures 1" so you have the templates printed at the correct size) and then using self adhesive laminating sheets apply to the sheets and then cut out your template shapes, the laminate will help reinforce the edges.
Paper/Cardboard: Plain paper templates are ok for single or minimal use but if you’re using a template over and over it’s likely to distort with repeated use if it’s plain paper cardboard. However, you’ll want to consider printing the templates out on heavier paper, if you’re able, to give them a little bit of bulk.
Heavy board: I pieced a quilt with 16 different blocks from cardboard templates. I sent the pdf of the templates to a print shop. They were printed on 300gsm board. Then when I got the sheets back I cut out my templates. They were nice and rigid held up with repeated use.
You can purchase template plastic to trace your templates on to and cut out. You can also reuse any flat plastic from food packaging for this purpose. I haven’t tried this Creative Grids template plastic but I like that it’s textured on the back!
A note on tracing templates from print outs: rather than putting the print out on a flat surface and then the template plastic on top and tracing (using a ruler for straight lines) I use a glue stick and glue the printed sheet to the top of the template plastic and then cut out the template on the seam line, I then peel off the paper. TIP: Mark each template with the correct letter or number from the pattern and the correct side if that's something that needs to be noted. There's nothing worse than coming back to a project and not remembering which piece is for what block!
Acrylic templates are thicker plastic often with seam allowances included and drilled holes or as 'donuts' with the centre cut out. These are a great option and a commonly available used material for patchwork templates. My block of the months often use acrylic templates. Where I can I'll have quilting marks cut out of these templates as well to assist with marking the quilt for hand quilting.
You’ll find sometimes that templates can be slippery and hard to ‘anchor’ down whilst you’re tracing. There are a few options you have to manage this and I have even used textured glitter stickers from a stationery shop (you can see these on the hexagon in the photo above, just under the apple pincushion).
Don't forget to check out these recent blocks...
Seam Ripper by Katie Mae Quilts
Headphones by Carolina Moore
Spool and Bobbin by Scrapdash
... and head to these ones...
Halloween Cat in sewing room by Dragonfly's Quilting Design Studio
Dress Mannequin by Applique's Quilts and More
Thread Cone by Cayenne Ridge Quilts
]]>
There are no 'must have' tools when it comes to hand piecing your patchwork and quilts, well aside from, you know, a needle and thread... however over time you'll find there are tools that you use again and again, that help you hand piece. I've listed my current tool box kit below, it can change over time, but these are pretty much my go-to tools.
]]>You're interested in hand sewing patchwork (handpiecing) and you wonder if there are 'special' tools. Well yes and no. There are no 'must have' tools when it comes to hand piecing your patchwork and quilts, well aside from, you know, a needle and thread... however over time you'll find there are tools that you use again and again, that help you hand piece. I've listed my current tool box kit below, it can change over time, but these are pretty much my go-to tools. The 'right' needle and thread can make the BIGGEST improvement to stitching.
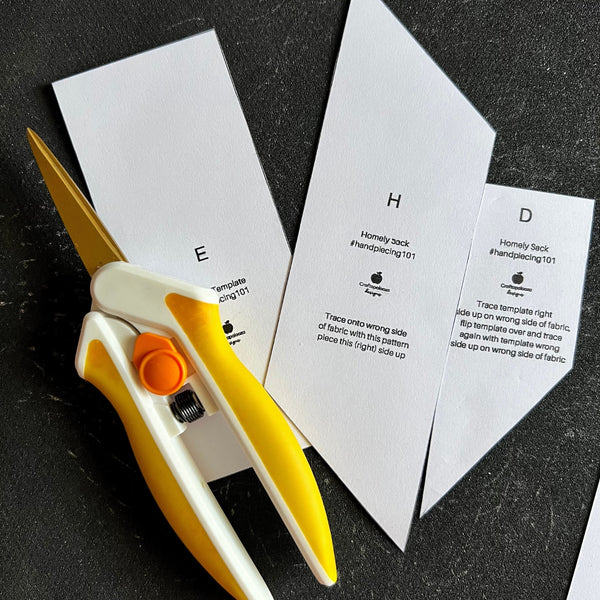
Templates - When hand piecing a quilt you’re often using designs that come with templates. If you’re making your own templates from the pattern use something like template plastic, paper or cardboard templates won't stand up to being used over and over. You can print paper templates from the pattern and then use self adhesive laminate or laminate them if you have one. I also cut my templates out without the seam allowance, preferring to trace the final block part as accurately as possible and then adding seam allowances.
Marking tools - I’ll mainly use a mechanical pencil 0.7mm with 2B leads, these leads are nice and soft, so they make tracing templates super easy, you don’t need to press very hard when marking, available from your local or online stationer. Sometimes I’ll use a silver gel pen to mark dark fabrics (make sure it's a gel pen).
Rulers - I like to use a small ruler with a quarter inch marking to add my seams to blocks. I have a couple of different ones on rotation with different lengths and I'll use the one that best suits the block pieces I'm adding seams to at the time.
Matilda’s Own Design Mat - I know a lot of hand piecers and English Paper Piece sewers like sandpaper boards to help keep their fabrics in place whilst they’re tracing or gluing templates on to fabric but I do not. It grates my teeth. I do however LOVE the Matilda’s Own Design Mats. I love the texture and the grip of these mats.
Thimble - I sometimes use a thimble for my thumb whilst hand piecing and have various ones in my stash and switch around all the time. It’s worth experimenting to find the ones that work for you. Using a rubber thimble on your thumb can help reduce hand/grip fatigue.
Karen Kay Buckley 1” Perfect Pins - These pins are my favourite for hand piecing and needleturn applique. I only use 2-3 per seam generally on smaller blocks and they are super fine so they have a low profile and are great to use for hand piecing and pinning blocks together. As you become more experienced as a hand piecer the less pins you’ll need. I also use the Clover Glass Head Pins and Sohmo Glass Head Pins. Addtionally, recently I've used the Clover Applique pins and these are also helpful when appliquing.
Roxanne's Glue Baste-It - I use Roxanne's when preparing my applique blocks. The smallest dabs will do the job, it's super useful. Do not use more than dabs, it can be hard to remove if you use too much and want to reposition a piece. It does wash out.
Needles - For hand piecing I’ll use a Miliner Size 10 or 11 needle or more recently I am using Bohin Applique long needles as I like the length for loading up my needle and they slide through fabric so nicely. As long as your needle goes through fabric like butter and has minimal drag, you’re good to go. You don’t want to be wrestling your needle through fabric! I’ve tried numerous brands and have also used Jen Kingwell, Sue Daley and recently tried Jeana Kimball needles, Jeana's Embroidery/Redwork needles are fabulous for big stitch handquilting.
Thread - For hand piecing I have used Sulky 100% cotton thread, 50wt, Aurifil 50wt and presently my go-to is Wonderfil Decobob, it's super light, fine, slippery and is smooth to sew with. I usually just use a silver grey for hand piecing, no matter what colour fabrics I’m piecing. If, however I was stitching an all over dark fabric I’d use a darker thread. For needleturn applique I'll use the Decobob, it's an 80wt and just disappears when sewing. The Bobbinator is also a fabulous accessory for machine and hand sewists. The prewound bobbins are perfect for applique.
Thread Balm - I don't always use thread balm, but occasionally if the thread I'm using is giving me a hard time and knotting or tangling I'll use it. Presently I'm using The Next Stitch Thread Balm and tend to go for citrus scents. You can check out the options available at the link.
Fiskars Easy Act Titanium Micro-Tip Scissors - I LOVE these Fiskars spring action scissors. I have used them for years now and when I need to replace them the older pair becomes a household scissor for the kitchen or paper. As I hand cut most of my fabric once I’ve traced templates the spring action helps my hand from getting fatigued and the small sharp blade is great for accurate hand cutting.
Seam Roller - What the what?! A seam roller is a hand piecers best friend. As you’re stitching away you can quickly set and press seams, no iron or electricity needed.
Oliso M3Pro Mini Iron -The new versioin of this mini project iron is coming soon. This mini is super cute, packs a punch for its size and is terrific for block pressing. Do yourself a favour with this tool. I use mine with a USA to AU power adapter, the iron has a Volt switch so I easily switched it to my voltage and use the adapter. The M3Pro is out soon!
Wool Mat - I can't remember where I got my mat, what I do know is it is THE tool to get nice flat blocks when pressing and you don't have to press the heck out of them! The heat from ironing reflects back up to your block and sets your seams really well.
Template Plastic - As you’ll likely be tracing your quilt block pieces over and over, paper templates won’t cut it. You’ll need to trace your template pieces on to template plastic, you can use these over and over again. Or if you have a laminator you can laminate your templates or use adhesive laminating sheets. Some quilt patterns also come with acrylic templates, lots of my patterns have an acrylic template available.
Seam Wheel - When tracing templates that have curved edges and no seam allowance added you’ll need to add your curved seams. And a little seam wheel is a simple and great little tool to have in your hand piecing kit. Put your mechanical pencil in the hole and trace your curved seam. Jen Kingwell has her own seam wheel at a great price. This is one of those sewing notions I keep a handful of in case I lose them, which I do!
Finger Pincushion - This little guy is super useful when you’re hand piecing and want to pull pins as you sew and you can quickly stick them into your finger pincushion… just don’t forget if you haven’t got it on and stab yourself (yep, maybe speaking from experience here).
This free pattern by Loopylace is the one I used and I also hand sewed mine, small stitches are key and it’s held up perfectly fine. Oh, and I used a 4.5” square, not 4” as mentioned in the pattern, I also wear mine on my index finger not my thumb.
Flatter Smoothing Spray Flatter is excellent to use on finished blocks, apart from smelling amazing, it does a great job of helping seams and blocks behave. I don’t use steam when I iron, just a hot dry iron and Flatter, Pineapple is the scent I love. Not only are the scents yummy it does a great job of smoothing blocks AND it's not starch based, which is great news for us hand piecers. Our blocks can sit around a bit longer whilst being sewn and starch is not a quilt's best friend, bugs are attracted to the starch as a food source so you'll potentially end up with bugs seeing your quilts as food! No thanks.
That sounds like a LOT of tools, but it's really just a handful of my favourites. You'll find over time that you gravitate to your favourite tools and stick with them. If you've gotten until the end, thank you! I truly hope you learn to love hand piecing as much as I do.
Do you have any tools that you love to use when making your quilts?
Please do comment if you have any questions and I have a freebie block below you might like to use to try handpiecing patchwork.
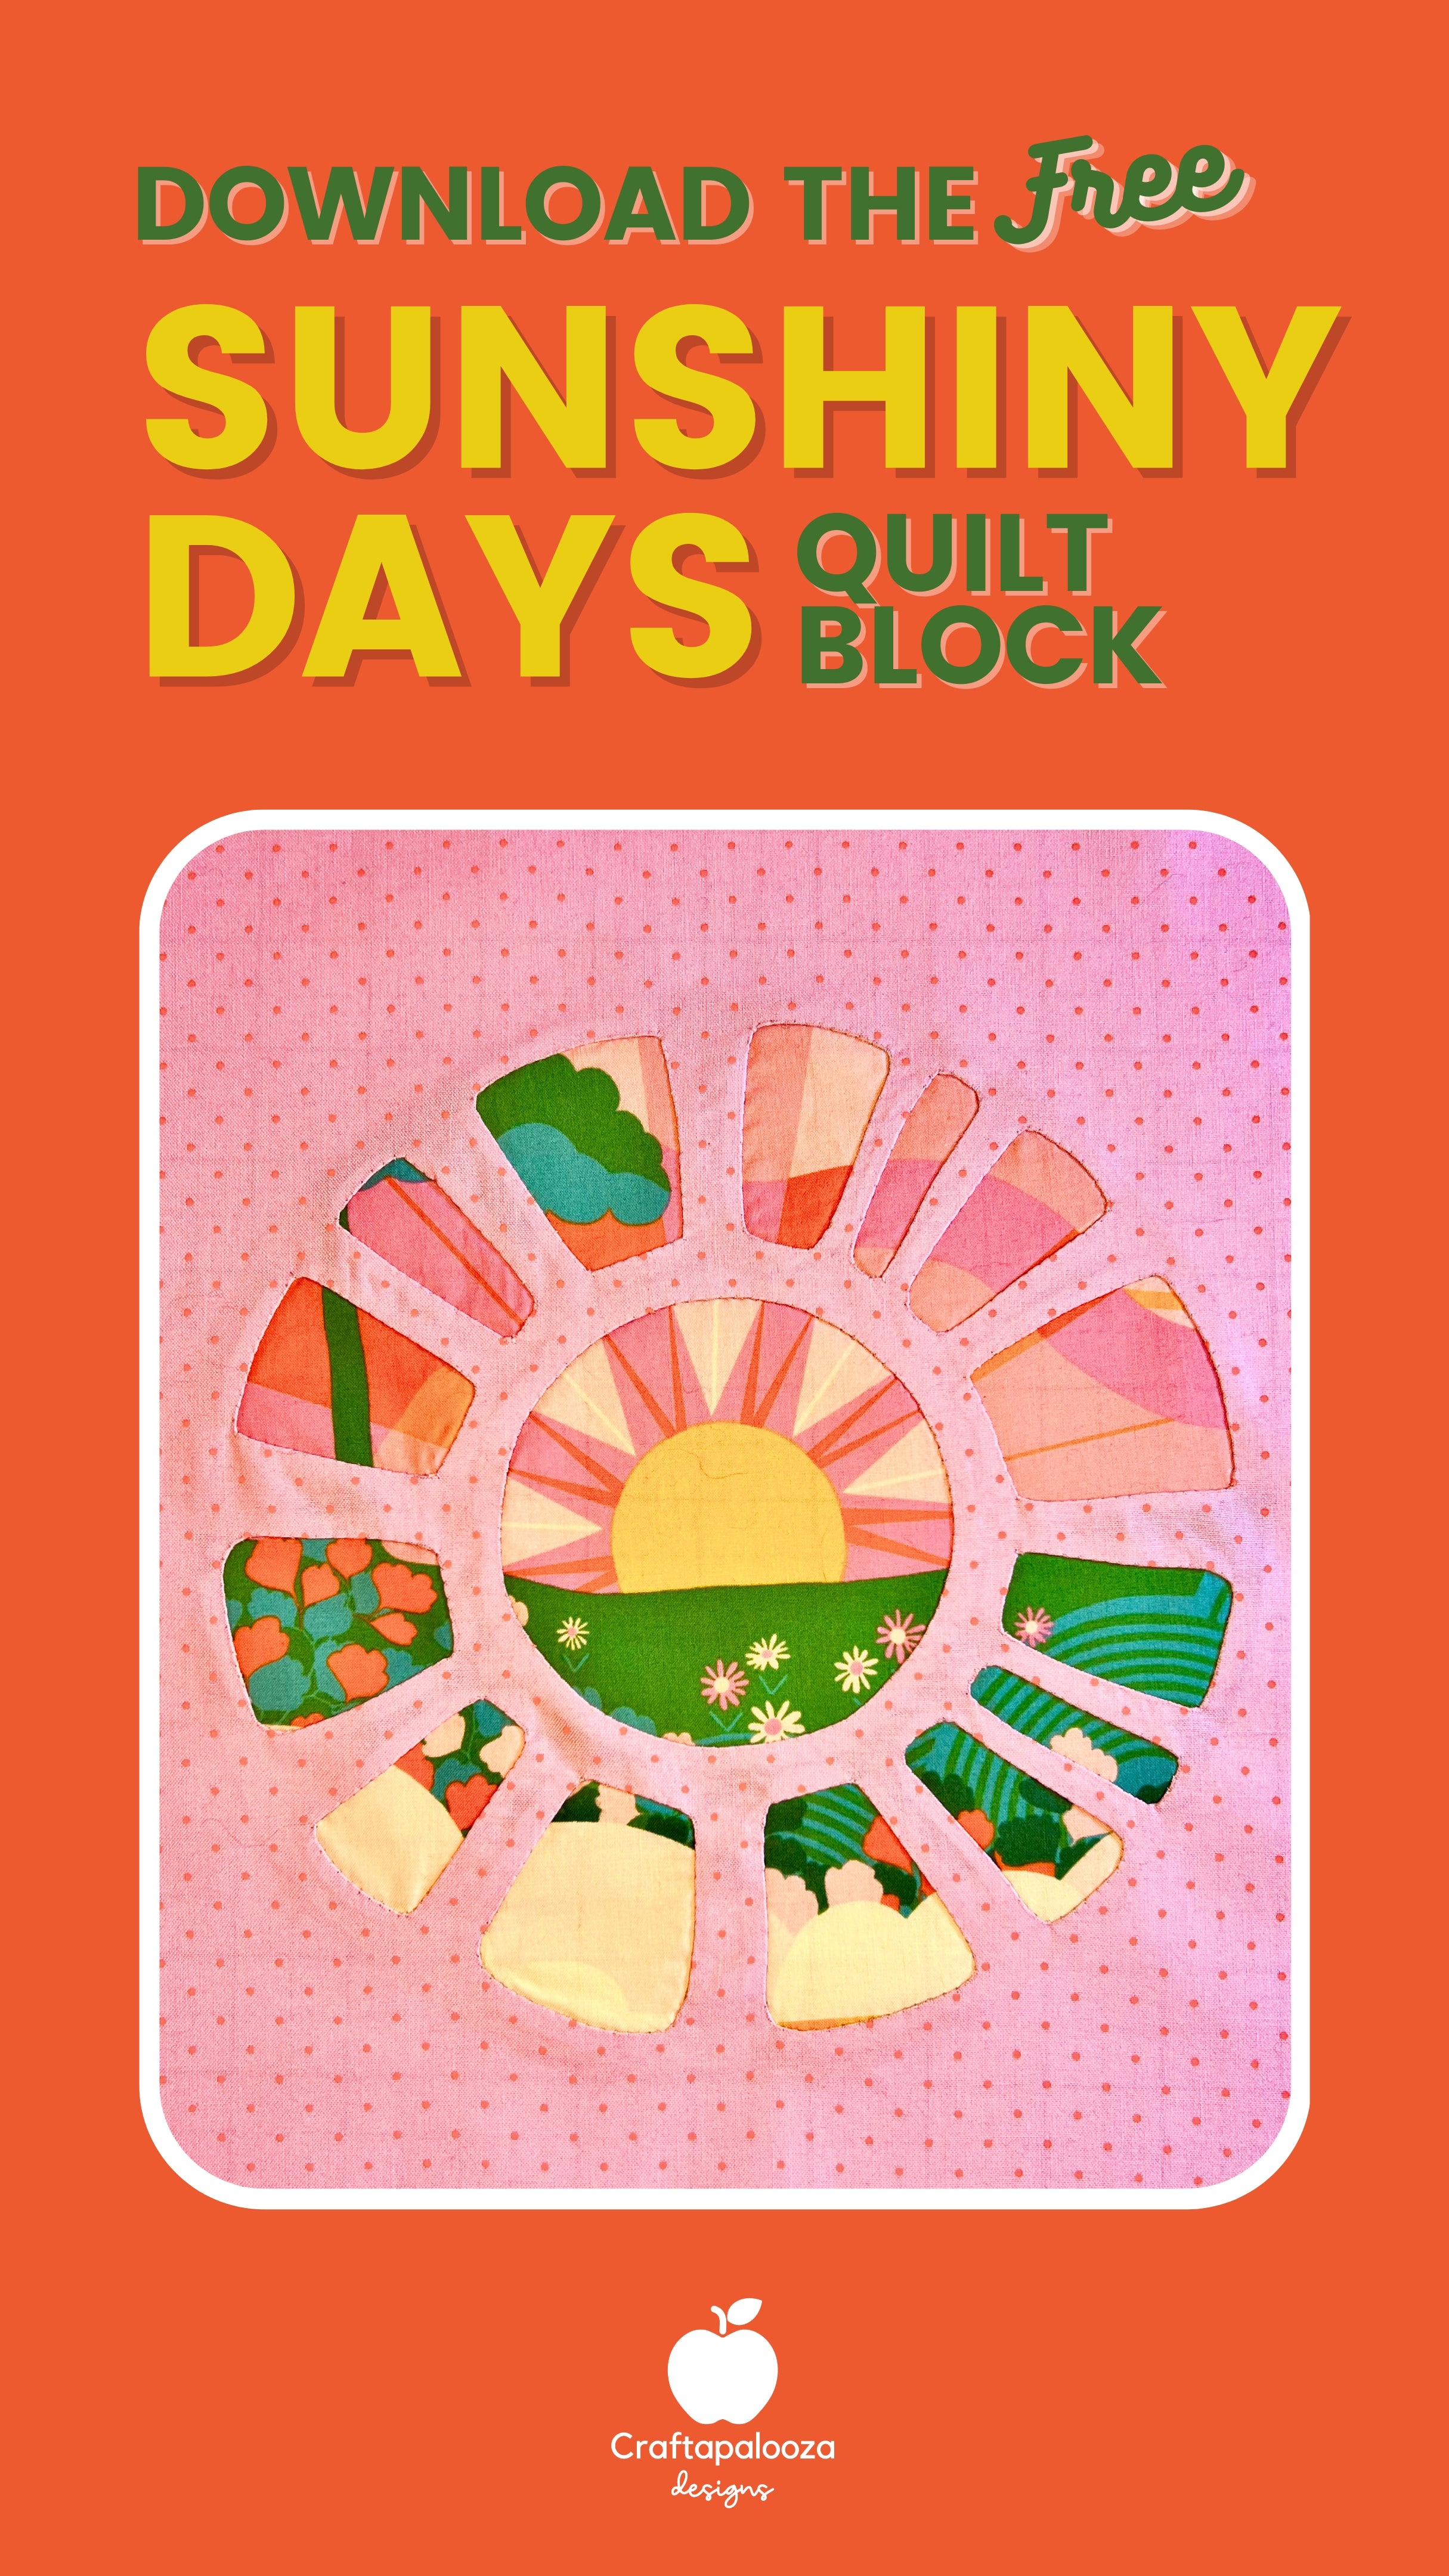
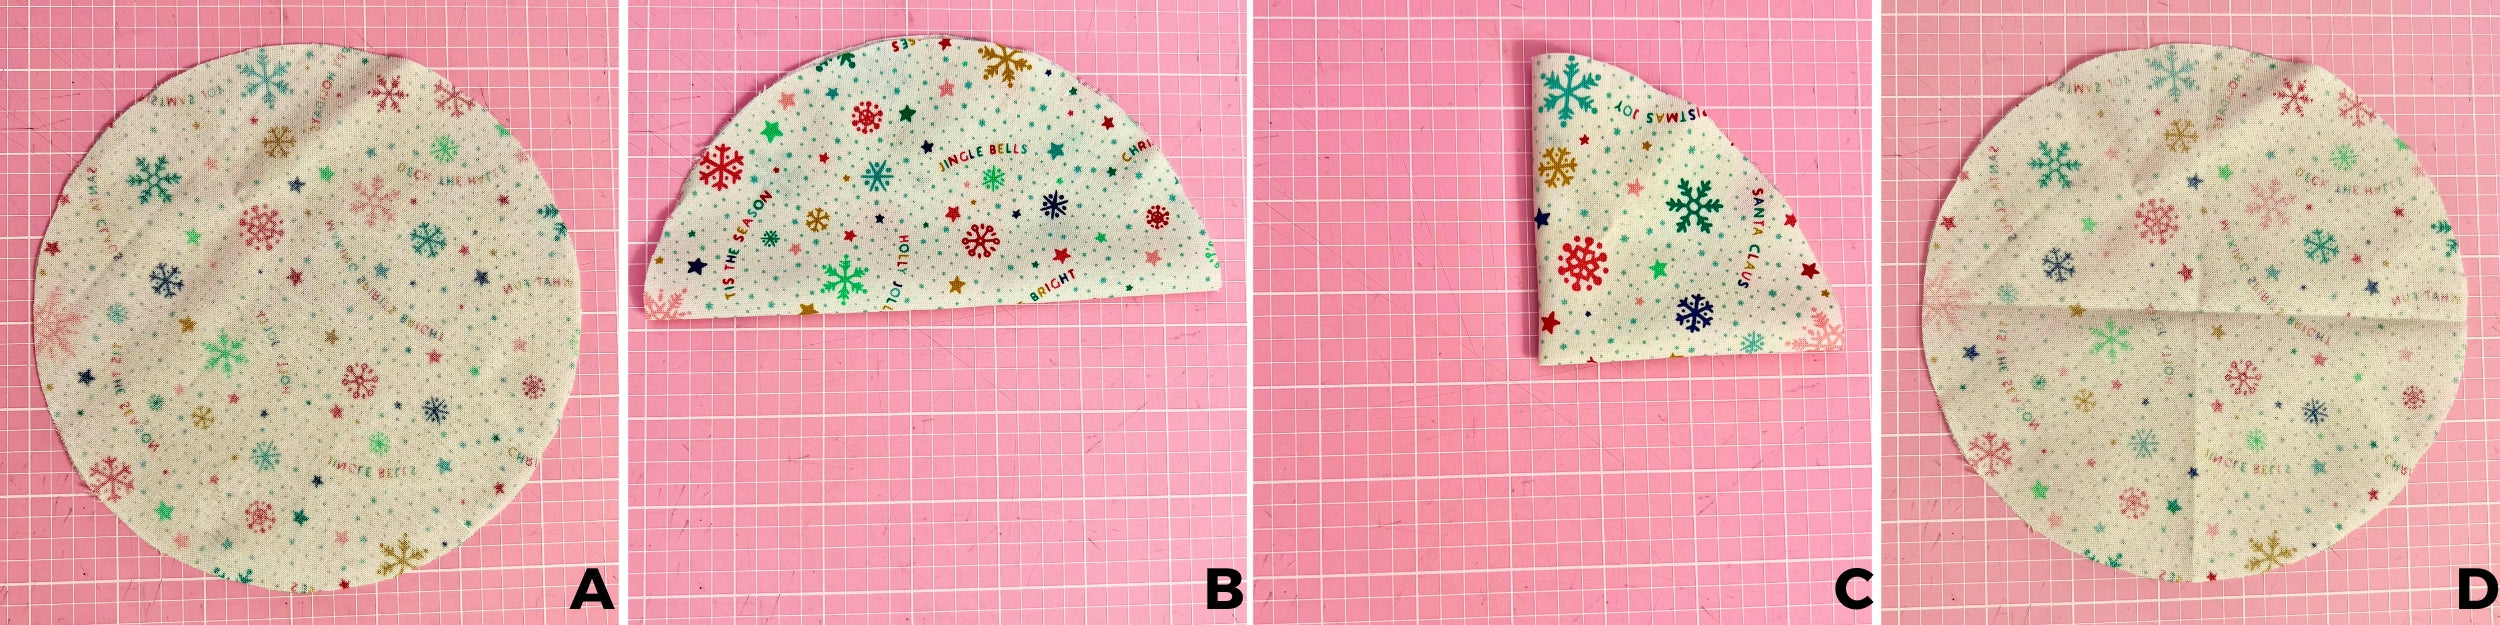
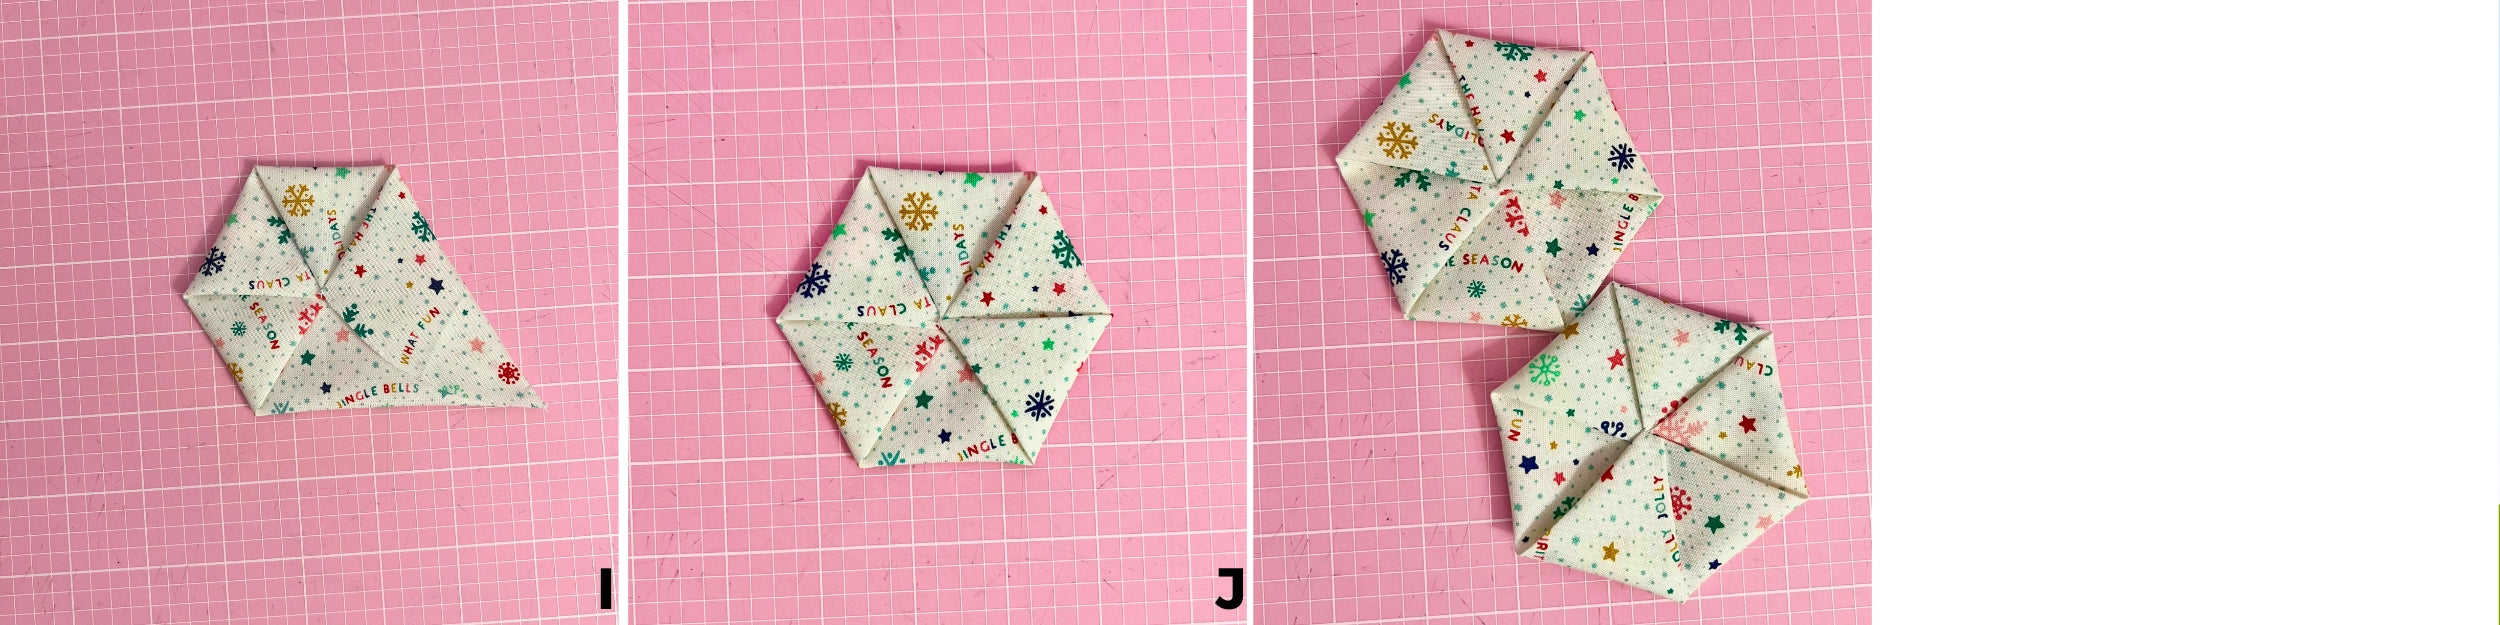
Put your details below and you’ll be emailed the Wheely Fun quilt block pdf. The pdf includes the block, templates and instructions on how to piece the block together, including the seam setting for the block so you have nice, flat blocks. There’s also a colouring sheet a coloured mockup so you can make your own Wheely Fun quilt. Get scrappy, dig out as many prints as you can and have fun!
By putting your details below you’ll receive the PDF and you’ll also sign up to my Scrappy Digest. The Scrappy Digest is sent out fairly irregularly and you can unsubscribe at any time. It’s a fun quilty digest.
]]>If you’re new to hand piecing but not new to quilting you may have never considered making your patchwork by hand or consider making patchwork by hand as a crazy endeavour! Before sewing machines were invented (in the 1830’s!) how do you think vintage quilts were created… by hand.
]]>Before sewing machines were invented (in the 1830’s!) how do you think vintage quilts were created… by hand.
Put your details above to the form and you’ll be emailed the Wheely Fun quilt block pdf. The pdf includes the block, templates and instructions on how to piece the block together, including the seam setting for the block so you have nice, flat blocks. There’s a layout suggestion with sashing measurements, colouring sheet and a coloured mockup so you can make your own Wheely Fun quilt. Get scrappy, dig out as many prints as you can and have fun!
By putting your details below you’ll receive the PDF and you’ll also sign up to my Scrappy Digest. The Scrappy Digest is sent out fairly irregularly and you can unsubscribe at any time. It’s a fun quilty digest. There are also templates available to purchase.
Well, I have a few reasons for hand piecing patchwork. The biggest one is the freedom you have. Yes freedom. Partial seams, Y seams and curved seams are a breeze when you’re hand piecing. I also don’t love spending a lot of time at a sewing machine. I love my sewing machine, I just don’t want to spend hours at her. I’d rather stitch by hand.
Stitching by hand will give you nice flat blocks. By not sewing into the seam allowance when piecing by hand your seams and seam intersections can be swivelled to sit nice and flat.
There’s also the process of making A WHOLE QUILT TOP by hand. Yes, it’s satisfying. It’s not always the fastest, no, but that can also depend on the blocks you’re piecing and how organised you are.
What do I mean by that? Well I can sit with my partner in the evenings and on weekends and stitch away, giving Netflix and chill a whole other meaning… If I’m on a quilt deadline I can take a block or two with me and stitch if I’m going to be waiting somewhere. All I need are my block pieces, needle and thread.
I will often hand piece all the blocks for a quilt and then machine piece the quilt top together. I’ll also attach quilt binding by machine and then flip it over and hand stitch it down.
Firstly print the templates and make sure you print them at 100% and check the 1” measurement once you’ve printed them, you can then trace them on to template plastic. Some quilts have with laser cut acrylic templates available, the templates you see me using in the videos below I've had printed on to heavy board and laminate for some test blocks. You want a template that will keep its shape when you’re tracing it over and over. So when making your templates consider this.
The biggest thing I’ve learnt with hand piecing quilt blocks is preparation is key. Once I’ve chosen my fabrics, I'll always grab more fabrics than I think I'll need from my stash and then I'll work out which prints are going with which blocks (I’m a scrappy quilter so the more prints the better) and then I’ll get to tracing all the pattern pieces on the relevant fabrics and adding seam allowances. For the WHOLE quilt. Well, wait. I often make a test block. Making sure I’m happy with how the block is coming together and looking and then I get to getting all my bits organised together. Pattern, templates, tools and fabric etc!
Well as I’m not sewing by machine and sewing by hand I need to have my seam allowance marked on to my fabrics. Some quilters can eyeball a quarter inch seam and not mark, I am not one of them! I also prefer to use quilt templates that don’t have seam allowances as I like to trace the shape as accurately as possible and then add the seam allowances.
If tracing an acrylic template that has the seam allowance included then I’ll trace the shape, mark any seam points and then using the template markings add the 1/4” seam allowances. To add curved seams, find the opposite template to your curved seam and you’ll be able to use that to trace your allowance, probably in two halves.
If tracing a template without seam allowance I’ll use a small seam wheel to add the seam.
Below are some short how-to video's on the basics of hand piecing patchwork. I have captioned these videos, I'm an Aussie that speak's fast and even though I did try to slow down my speech, it will probably be difficult to catch some of my articulation, so captions should be helpful.
If you have any questions about hand piecing your patchwork and quilts, drop me a comment below. I truly love making quilts by hand and yes I have more than one WIP on the go... don't we all?!
EDIT: I have a post about tools I love and use. LINK
]]>
If there's one quilt along you want to do for 2021 it's Angie's - GnomeAngel 100 Days 100 Blocks. The premise being you sew a block a day for 100 days and share to social media, with a bunch of other people. BEFORE you *sigh and walk away thinking 'crazy pants 100 blocks in a 100 days who has time for that', I'll explain. Read on Padawan... (oh, and there's a discount for you at the end).
If you don't know Angie and her sew alongs you're missing out. Ange runs excellent events and whilst 100 blocks in 100 days sounds crazy and daunting, it is totally doable! I should know, I have done it before with her in 2016! Yep 2016.
Back then Ange was using Tula Pinks City Sampler book for her 100 days event and for me, it was an exercise in practising and improving my quarter inch seams on a sewing machine. Hand piecing is my method of choice normally and my quarter inch on a sewing machine was not consistent.
The 6" blocks for this event at the time were a challenge, but one I embraced, with a grimace at times, but still embraced, determined to do all 100 blocks on the sewing machine. To keep up I worked in chunks, cutting 7 - 14 blocks out at a time and having them ready to sew and then sewing 7 blocks in one sitting. That allowed me to keep up with sharing the blocks on social media once a day for 100 days. Yep I did it, and you can too!
I then stalled at putting the quilt top together as I didn't want to sew sashing between the blocks. In the end decided to ditch the sashing and just piece the blocks together in a colour order of sorts (you can see what I mean by the photos!). I had this quilt longarmed by a Carol at The Quilting Cottage, the first time I've ever done this and it was amazing. I'm *cough still to attach the binding, but I'll get there. I love this quilt.
I used Ruby Star Society fabrics and Moda Grunge for my solids and it was fun fussy cutting the motifs in the designs. You can also see all my individual blocks here.
So what's happening for 2021?
For 2021 Angie is using her Kinship Fusion Sampler quilt pattern and it's a terrific pattern for those new to quilting all the way through to an experienced quilter. She'll be offering various layouts and projects for the event so if you don't want to sew 100 blocks you don't need to. The great thing about Kinship is the blocks are nice and chunky at 8", so you get to chop into those larger prints or really fussy cut that favourite hoarded print that's just a little large.
Angie's patterns are some of the best out there when it comes to quality and volume of information, with terrific technical descriptions and illustrations as well as being clearly laid out and organised. She has a system and for a 100 blocks, you kinda need it. She provides colouring sheets as well. I also happen to know for this year that she has options for different layouts and sized projects. So you really can choose your own adventure.
I haven't planned my Kinship this year yet, it kicks off 1 July so I have time but I'm going to make a quilt for my love, Sondra. I'm also going to machine piece the blocks, rather than hand piece for a change and do it in chunks of work. I'm looking forward to jumping into #100Days100Blocks2021
The quilt along is free, you just need a copy of the Kinship Fusion Sampler pattern AND sign up to the event HERE. The pattern is available in print or PDF formats including machine pieced AND foundation paper pieced options. She's got you covered! It's super fun checking out everyone's versions, so if you're on Instagram follow the #100Days100Blocks2021 hashtag and if you prefer Facebook, join the Home of the GnomeAngel group and share your photos there.
I have a 10% off offer for you for Kinship and all things GNOMEANGEL! Just use this link and at check out it will be automatically applied!
Some of the links in this post are from affiliates and if you go through them to make a purchase I will earn a commission.
]]>
How many quilt projects do you have on the go? 5, 10, 20... more? No shame in your game however many works in progress (WIP's) you have or don't have! I have a free quilt planner and tracker ready for you to download!
]]>How many quilt projects do you have on the go? 5, 10, 20... more? No shame in your game however many works in progress (WIP's) you have or don't have! You do you. I personally have a couple of handfuls of quilt tops on the go as well as finished quilt tops. Rather than getting overwhelmed by this, I choose to organise. So, quilt planners and a WIP tracker works for me. These help remind me where I am at, who the designer is, what fabrics I decided on and more, once I come back to a project. I'd like to be a one quilt at a time quilter, but I'm not.
My brain likes to start new projects and I dip in and out of inspiration for quilts over time. Being a hand piecer by choice I am ok with quilts taking time for me to finish. I enjoy stitching away. If you're new to hand piecing and have any questions you can reach out to me any time! We were all beginners at some point.
I made this planner and tracker for myself and if you'd like it, put your details in the form below and they'll be delivered to your inbox! The trackers are PDF files you can download and either print and use or fill out electronically and then print if that's your preference.
By signing up for the quilt planner and WIP tracker you'll be signing up to our newsletter. You can unsubscribe at any time and we will not share your information without your consent.
The Bloomin' Quilt series is LIVE and there are two designs in the series.
Bloomin' Awesome is straight up patchwork with the applique doing all of the heavy lifting. I designed the motif (well three of them and this is the surviving design) and then spent a lot of the past two pandemic years stitching away. No! Your quilt won't take that long to sew, I just picked it up and put it down and took my time, I also was resolving the design as I went... something I don't do often, but did with this guy. I LOVE this Bloom motif and appliquing it never got tired. Using Liberty Tana Lawn, each print kept me interested. The Bloomin' Awesome you see here used Liberty Tana Lawn and Essex Metallic Linen. You can use your own combo of patchwork fabrics, try using lawns as well (they don't have to be Liberty prints, there are lots of different lawns available now), they applique beautifully. The yo-yo's add some extra texture and interest. You could always opt to just needle turn the circle in the middle of the Bloom block and then the outside if you wanted. Additionally, both patterns come with quilting plans/ideas. My version of Bloomin' Awesome was custom quilted by Carol at The Quilting Cottage, she did an amazing job.
This secondary design is called Bloomin' Confection and is a simple brickwork patchwork with 20 applique blocks and uses the applique template as the hand quilting pattern.
I've designed the brickwork patchwork row by row and there won't be any seam matching when sewing the rows together. There is also the opportunity to use larger scale prints and to have some fun adding some texture by using wovens. I'll show you more soon! Of course I've added some sparkle with Robert Kaufman, Metallic Essex Linen and I've used Essex Speckle for the first time and it is delicious. Yep, delicious. It's squishy and the pink and blue used are PERFECT for Bloomin' Confection. You can see some glimpses in the photos here. The hero in this design is the big stitch style hand quilting. The pattern comes with a suggested diagram, but basically take your bloom motif template and go nuts!
Bloomin' Awesome and Bloomin' Confection launched at the same time, together with an acrylic template option.
The patterns come with video instructions showing how to needle turn applique and all of my tips and tricks when sewing this particular block. Needle turn can be intimidating if you haven't done it before or haven't had success in the past, but everyone is a beginner at some point, as was I. My applique did not always look like what you see here! Practice, practice and more practice as well as using suitable thread and needle for applique that can help your work shine. My videos will show you some progressions to get you started as well as needle turn techniques to sew your Bloom blocks. As long as you have a result YOU'RE happy with that is all that matters. There is also a video for making your yo-yo's.
Let me introduce you to Monochrome Peel quilt pattern published in Make Modern Magazine issue 38! Monochrome Peel was hand pieced and hand quilted big stitch style however it can be machine sewn and quilted if hand sewing isn't your jam!
]]>Monochrome Peel is designed with the Rob Peter to Pay Paul quilt block as a reference. This version has hand pieced blocks, machine pieced blocks together and hand quilted big stitch style, the binding was machine sewn to the front and flipped and hand stitched down on the back. This quilt can definitely be machine sewn and quilted if hand sewing isn't your jam! The curves are super gentle on this quilt, so machine piecing is absolutely an option, I'm a hand piecer at heart.
To get the same scrappy quilt as pictured in the pattern, the more prints the better. Aim for 50-100 or more if you have them, do a fabric swap with other quilty friends or ask your quilt shop for a bundle! Layer cakes can be used, cut down to size using the templates.
Videos on hand piecing tips - including using templates are below. Hand piecing curves will be added soon to this series.
I'd love to see your Monochrome Peel makes. Tag me on Instagram @craftapalooza and use the hashtag #monochromepeelquilt
If you have any questions about the pattern please do get in touch and we'll get back to you.
]]>Make your own adorable apple pincushion, perfect for using up scraps and even more perfect for end of year teacher gifts or for the quilters and sewists in your life.
I am have three to four launches a year of apple pincushions made by me. There are limited numbers of these available in fun, scrappy patchwork fabrics and also some exclusive Liberty Tana Lawn pincushions and OOP fabrics like Heather Ross Lightning Bugs prints. By signing up my newsletter (form below) you'll have first notice of pre-made launches. You can also find any available pincushions here.
If you'd like to host a live Apple Pincushion event get in touch here. Presently these are run via Zoom and take 1-1.5 hours and are for groups up to 20 participants. We sew along together and participants will have their own pincushion by the end of the event. If you have a larger group, get in touch and we can discuss your options.
If you're Perth based get in touch and we can organise an in-person event.
]]>
Hand piecing, hand quilting and applique... for some, in the quilting world, when they hear those words it's like hearing 'lions and tigers and bears, oh my'. There's also the mindset of why would you do handwork when you have a perfectly good sewing machine...
]]>Hand piecing, hand quilting and applique... for some, in the quilting world, when they hear those words it's like hearing 'lions and tigers and bears, oh my'. There's also the mindset of why would you do handwork when you have a perfectly good sewing machine... and I do have a perfectly awesome sewing machine that I do use... But hand work is my first love.
My craft blog over 20 years ago was all about crafting and then over the years my crafting has definitely become all about quilting. I was introduced to hand piecing through an Australian quilt designer, Jen Kingwell. There was a big Aussie blog meetup at a quilt shop and seeing the hand pieced quilts totally captured me.
Over the years I've completed online courses, watched videos, attended some classes and slowly improved my hand work skills. I'm constantly learning and honing my skills.
Well, like I said above I love hand work. BUT I also love the mindfulness and glimmers that hand stitching provides. I'm in no rush. I love that some blocks just come together amazingly well with hand piecing. I love cutting out my patchwork pieces and marking seams by hand and then stitching away. I keep block boards handy and stack them up with blocks ready to go and stitch away. I also love that I'm not hidden away in my sewing room and can spend time with my partner whilst doing hand sewing. Hand sewing patchwork is also very portable!
I'm not anti-sewing machine by any means but my machine is not my first go-to when starting a project. And, for sure, being able to zip some patchwork together for a 'quick' quilted gift is an amazing thing to be able to do.
I believe hand piecing can give you great insight into how some blocks come together as well as the dreaded Y seam (or whyyyy seam!).
Yeah, yeah, applique CAN strike fear into some quilter's hearts and turn quilter's off, being intimated by the skills involved. But choose the method of applique that you love, fusible, needle turn, freezer paper, there are so many ways you can tackle applique.
My preferred method is needle turn. Did my applique look amazing at first, hell's no, it was pretty average but over time and with practice it has improved and I love doing applique now. It used to be something I dreaded and I didn't want to do fusible, I wanted to needle turn, so I stuck at it until I started to improve. Practice isn't about perfect, but about getting the result that you are happy with in the end. So next time you come across an applique pattern you like the look of, try it out! Do an online class, or class in person, or learn one-on-one, however you like to learn and then practice, practice and yep, practice. You can read more about needle turn applique at this link.
To reiterate, I am NOT anti sewing machine when it comes to quilting, not at all and when I'm under a deadline, hand work is not always my friend and so the machine comes out. However, if I have the opportunity to sew by hand I'm there in a heartbeat. So give it a crack sometime, you might be surprised at just how much you enjoy it!
Make Modern is a magazine created by quilters for quilters with the added bonus of being digital.
One of the best things about Make Modern is that once the latest issue hits your inbox, you can download and read it immediately. No waiting for a postal delivery!
]]>One of the best things about Make Modern is that once the latest issue hits your inbox, you can download and read it immediately. No waiting for a postal delivery!
Make Modern is published bi-monthly and comes with at least 10 patterns as well as feature articles and regulars. The feature articles are often interviews with quilters and designers all over the world and regular features are everything from quilting tips and tricks through to the latest in quilting books and fabrics and more.
Issue 38 includes my first ever magazine published quilt pattern 'Monochrome Peel'.
If you're interested in the magazine, there are lots of subscription options including purchase of a single issue:
The All-access subscription is the mother load of subscriptions. You will receive every issue ever published, that's 39 magazines PLUS the next year's worth of issues (another 6). That's over 350 full patterns, yours to download and keep forever! Pretty darn cool. AND once you place your order you receive the magazine in your inbox within minutes. No waiting for a postal delivery.
Even if you like just one pattern in an issue, the purchase of a single issue is very reasonable.
There's a fantastic photographic pattern gallery with every pattern ever published listed with a link to the relevant issue. LINK to pattern gallery.
Some of the links in this post are from affiliates and if you go through them to make a purchase I will earn a commission.
Full disclosure, I presently am the social media manager for Make Modern and any link you click to the magazine from my website is likely to be an affiliate link.
]]>I'll take you through my process and tools used for this flimsy. It's still a flimsy and I'll update here when I finish the hand quilting.
I chose a mix of fabrics from Tim Holtz ranges ‘Correspondence’ and ‘Dapper’ and used other ranges of his I had in my stash. I mixed in Moda Grunge solids and spots together with Essex Metallic Linen. I wasn’t overly fussy with placement, keeping prints tonally similar to Jen’s blocks when choosing them.
The colouring for this quilt is a departure from my usual choices and the limited palette was challenging and fun. It’s still scrappy with over 50 different prints. The images below are from the Fat Quarter Shop, whom I purchased fat quarter bundles of both of these ranges specifically for this project.
Whenever I’m starting a quilt I do a fabric pull from my stash and put aside the chosen fabrics in a tub specific for that project whilst I’m working on it. I hand pieced all the blocks as I’m more accurate with this method and also prefer it to sitting at a sewing machine, I like to handpiece at night whilst hanging with my partner and fur kids, watching our latest Netflix binge! For the blocks with applique, I needle turned them, first attaching them to the background with dabs of Roxanne applique glue.
When the templates arrived each month I took a moment, read through the instructions, looked at how many blocks were required and then sat on it for a few days. When I was ready to start the block I did a fabric pull for the blocks and played around until I was happy, considering things like the scale of the print, the shade of colour, whether to use my ‘solid’ or not and where to use it. I used the colour sample provided in the pattern instructions to give me an idea of contrast needed for the block.
I’m not a ‘super’ fussy cutter, I don’t mind a little of it in a quilt but a whole quilt fussy cut tends to give me a toothache (my personal preference, you guys that are fussy cutter lovers more power to you!). You’ll see a little fussy cutting here and there in my quilt. If you are familiar with Tim Holtz prints you’ll know that some of them do not allow for fussy cutting due to the scale and format of the print, which I don’t mind at all, I love that lots of the prints used have the same colour tone but different ‘images’, from the same print. I think it helps with interest and movement in the final quilt and removes some of the ‘sameness’ of using only 50ish prints. 50 prints sound like a lot of variety but it’s not as many prints as I’d normally use.
I’m at the point where I have finished piecing the blocks and have sewn the top together, pictured here. I’m planning on hand quilting this with Aurifil 12wt and for the backing I have yardage of a Tim Holtz print gifted to me by a generous friend.
The right tools do help with some processes. It’s absolutely is a personal preference kind of thing and sometimes the investment in a few tools can make a process THAT much easier. Here’s what I used:
Marking fabric – I use a mechanical pencil with a 2B lead, this is after doing a workshop with Jen last year, it’s a game-changer. The 2B lead is softer so you don’t have to press hard and it marks nicely and is easy-to-see. Sometimes I use a silver gel pen (make sure it’s gel) and this helps with giving a reflection and visibility, but it depends on the print as to whether I do this.
Roller – I do love to use a little roller to save me ironing pieces as I piece/applique. I don’t iron the block until I’ve finished it. The roller just helps flatten seams.
Fabric spray – I used Flatter smoothing spray, it’s starch free (which helps with keeping bugs away from your project) and comes in yummy scents, is lovely to use and really helps smooth out a block when ironing it once it’s pieced.
Needles – Milliner number 11 to stitch my pieces together and for appliqué.
Pins – I love Karen Kay Buckley pins, they’re super fine and go through fabric like butter, I find they help keep a low profile when pinning.
Thread – For applique I've used Aurifil 50wt and for piecing 80wt. With some of the appliqué, I do change the colour where high contrast fabrics are butting up against each other. I usually test a few stitches make sure I’m happy with what’s happening.
The first-ever BOM I took part in was Jen’s Green Tea and Sweet Beans. I had NO IDEA what I was doing, literally. I look at my handwork now and can see I have progressed hugely since then, but I still love that quilt. Presently, it’s an unfinished flimsy. At the time of completing the main part of the quilt I stalled at the borders as my applique skills weren’t fabulous, but now that I have improved (time and practice) I want to get the flimsy finished so I can baste the quilt and start hand quilting it.
If a BOM is out of your budget, then look to doing the pattern or template only version. You can then shop your stash and still participate with everyone else and be inspired.
You can find me on Instagram as @craftapalooza and the same on Facebook. I create my own hashtags for my projects on Instagram, my Golden Days quilt is #crftgdaysq create your own project hashtags so you can see all your blocks in one place on Instagram.
Jen Kingwell's Golden Days Quilt flimsy:
My flimsy - using Tim Holtz prints and Moda Grunge and Robert Kaufman Essex Metallic Linen:
]]>